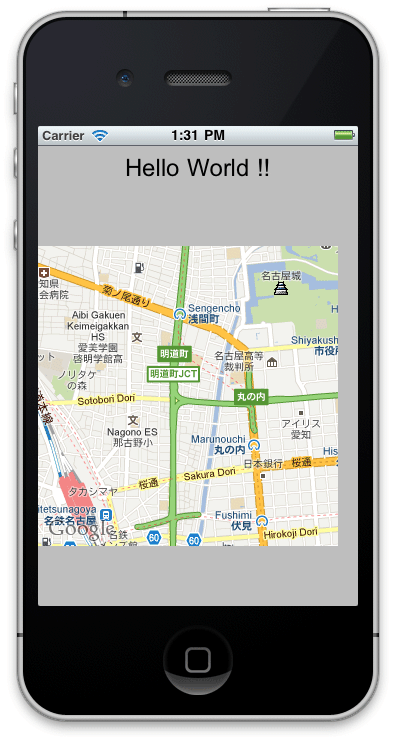
Xcode に標準で用意されている MapKit という地図フレームワークを使ってみる。
動作確認しやすいように、拡張性のないシンプルなサンプルにしてみた。
環境:
・Mac OS X 10.6.8 Snow Leopard
・Xcode 3.2.6
新規プロジェクトを作成:
Xcode のメニューから [iOS] → [Application] → [View-based Application] テンプレートを使用。
「HogeSample」という名称でプロジェクトを作成。
プロジェクトにフレームワーク MapKit.framework を追加
HogeSampleViewController.m というのが自動生成されているので、このファイルで
#import <MapKit/MapKit.h>
をインクルード(インポート?)して
viewDidLoad 関数(メソッド?)を以下のように書き換える。
- (void)viewDidLoad {

  [super viewDidLoad];

  UITextView *textView = [[UITextView alloc] initWithFrame:CGRectMake(0, 0, 320, 460)];
  textView.text = @"Hello World !!";
  textView.textAlignment = UITextAlignmentCenter;
  textView.font = [UIFont fontWithName:@"Arial" size:24.0f];
  textView.backgroundColor = [UIColor clearColor];
  [self.view addSubview:textView];

  MKMapView *mapView = [[MKMapView alloc] initWithFrame:CGRectMake(0, 100, 300, 300)];
  mapView.mapType = MKMapTypeStandard;
  CLLocationCoordinate2D coord = {latitude: 35.178088, longitude:136.891022};
  MKCoordinateSpan span = {latitudeDelta: 0.02, longitudeDelta: 0.02};
  MKCoordinateRegion region = {coord,span};
  [mapView setRegion:region];
  [self.view addSubview:mapView];

  [textView release];
  [mapView release];
}
ビルドして実行すると地図が表示される。

Ref. iOS Developer Library - Map Kit Framework Reference
tags: iphone xcode mapkit
Posted by NI-Lab. (@nilab)


